Web Scraping with Automa and Oxylabs
by Automa Support Team·
Getting reliable web data is quite the endeavour nowadays. Site restrictions, dynamic content, and the scalability of operations present major challenges. Today, our main focus will be on using the Automa AI-powered solution to create an automated workflow that circumvents these issues with the help of the Oxylabs Web Scraper API.
What do you get with the Oxylabs Web Scraper API?
The Oxylabs Web Scraper API provides you with a fully managed web scraping infrastructure as a service. This includes location-based scraping, scalability, multiple scraping modes, and structured outputs out of the box – meaning that’s one less thing for you to worry about.
By combining this functionality with Automa AI Power, you can scrape popular platforms like Google and Amazon, run multi-URL batch scraping at scale with dynamically adjustable parameters, and obtain parsed data to feed directly into your AI workflows.
Integrating Oxylabs Web Scraper API with Automa’s AI Power
The AI Power platform offers two main modes of operation: Workflows and Agents.
Workflows: These are the core engines for automated, batch-processing tasks. They are the more powerful option for users who need to build automations that scrape large amounts of data on a recurring basis.
AI Agents: These provide a conversational, flexible interface for one-off tasks. Users can simply chat with an Agent in natural language to trigger a preconfigured Workflow. This offers an easier, more interactive way to use an existing automation.
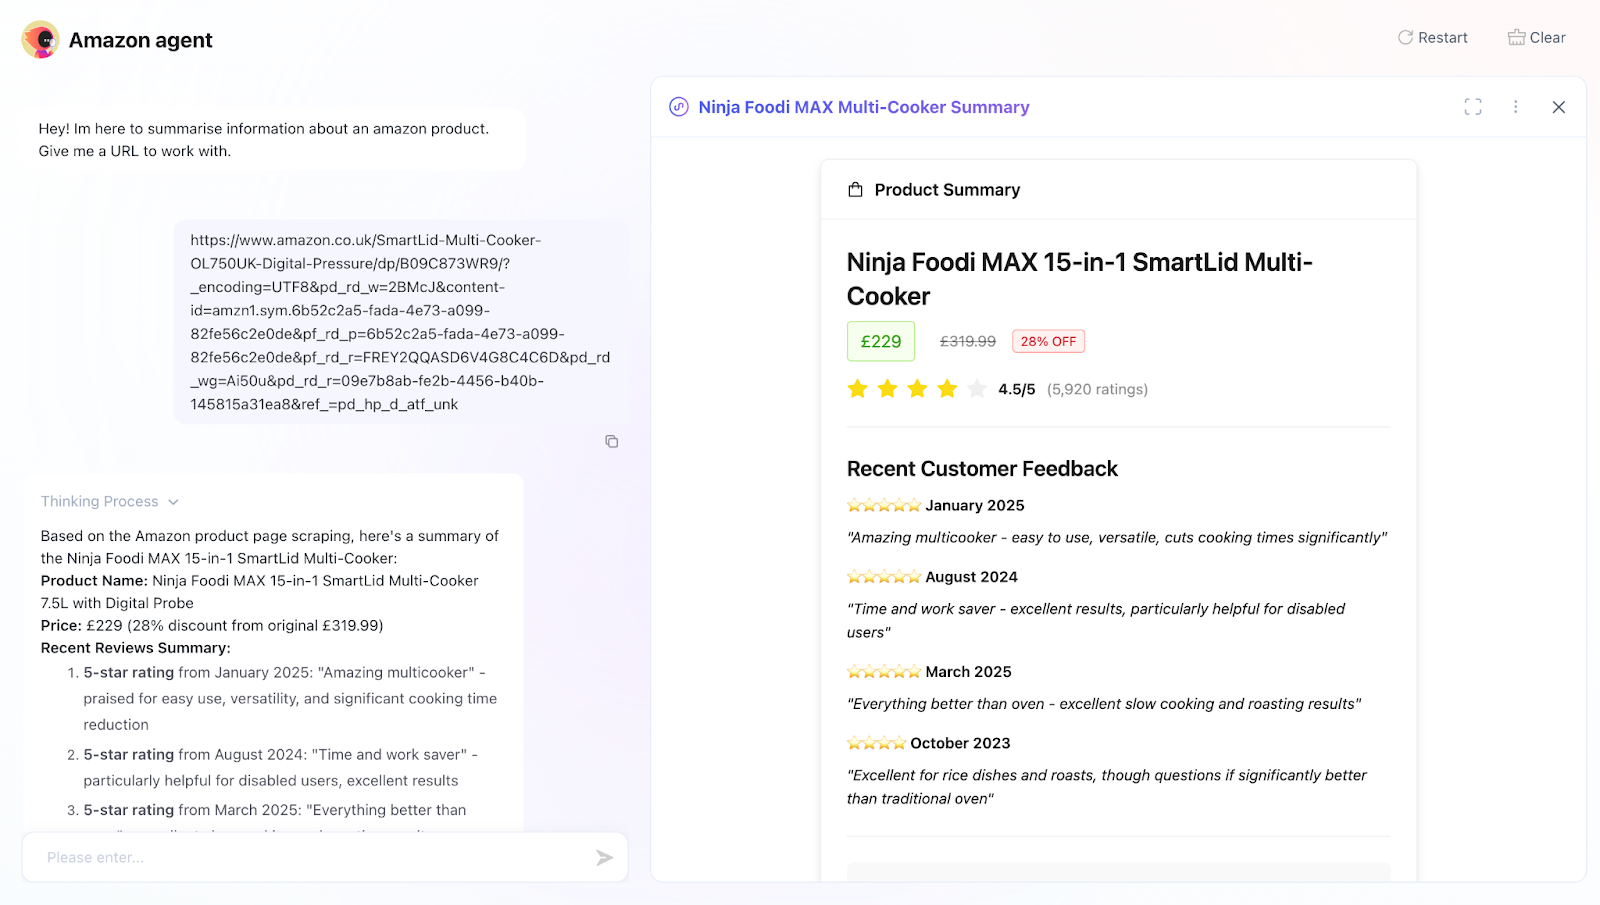
In today’s tutorial, we will showcase the AI Agent integration, which takes an Amazon product listing of your choice and summarises information about it.
Step 1: Set up Oxylabs Web Scraper API
You can get a free Web Scraper API trial in the Oxylabs dashboard. Then, head to the Oxylabs documentation for instructions on how to connect:
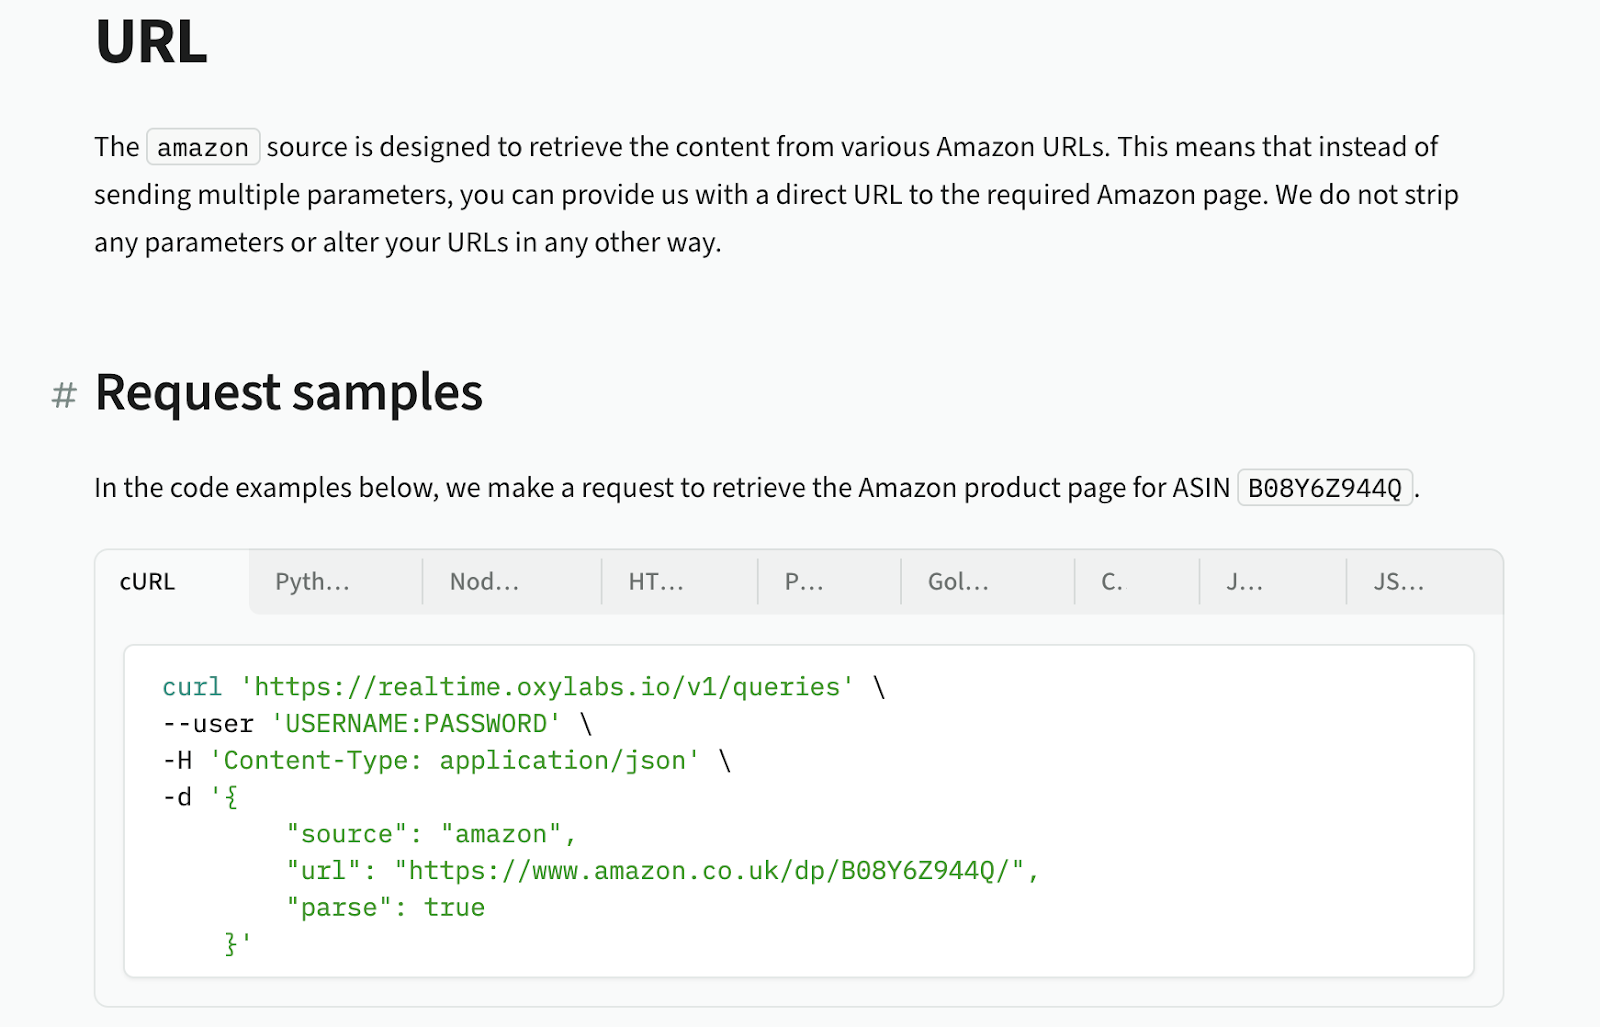
You will need your username:password combination for basic authentication. For simple scraping, you will also need a source (which denotes the type of scraper you want to use), a URL containing the Amazon product page you want to scrape, and parse set to true to automatically return parsed, well-formed data from the webpage. You can read more about the available configuration parameters here.
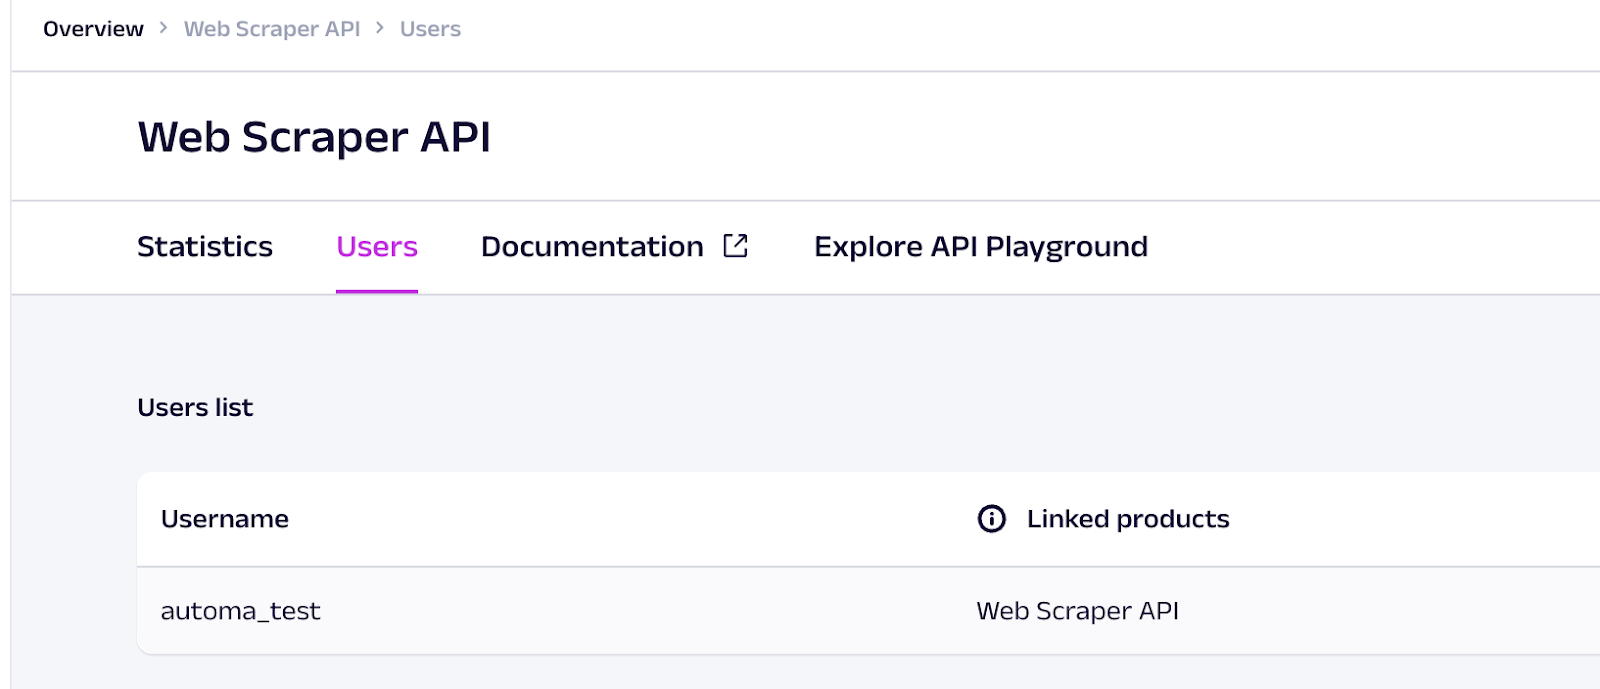
Next, you’ll need your credentials. You can find them by logging into your Oxylabs dashboard and navigating to the Web Scraper API user management:
Step 2: Creating a Connector for Oxylabs Web Scraper API in AI Power
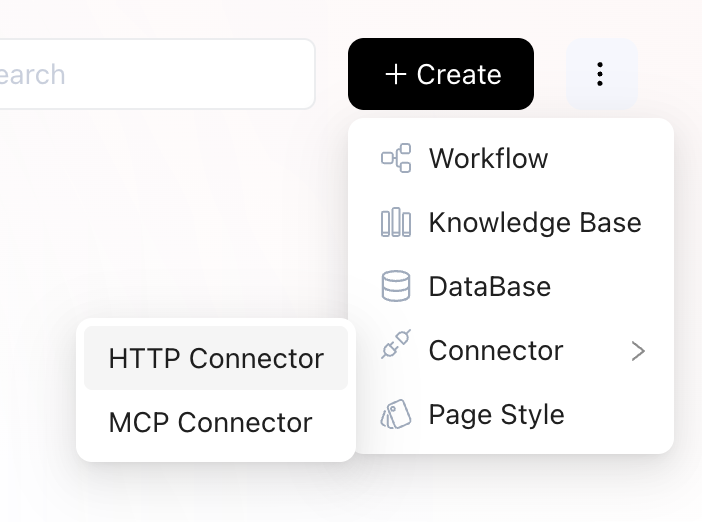
Now that you have your Web Scraper access, let’s set it up in the Automa AI Power dashboard. Begin by navigating to the connector management page and clicking the Create button:

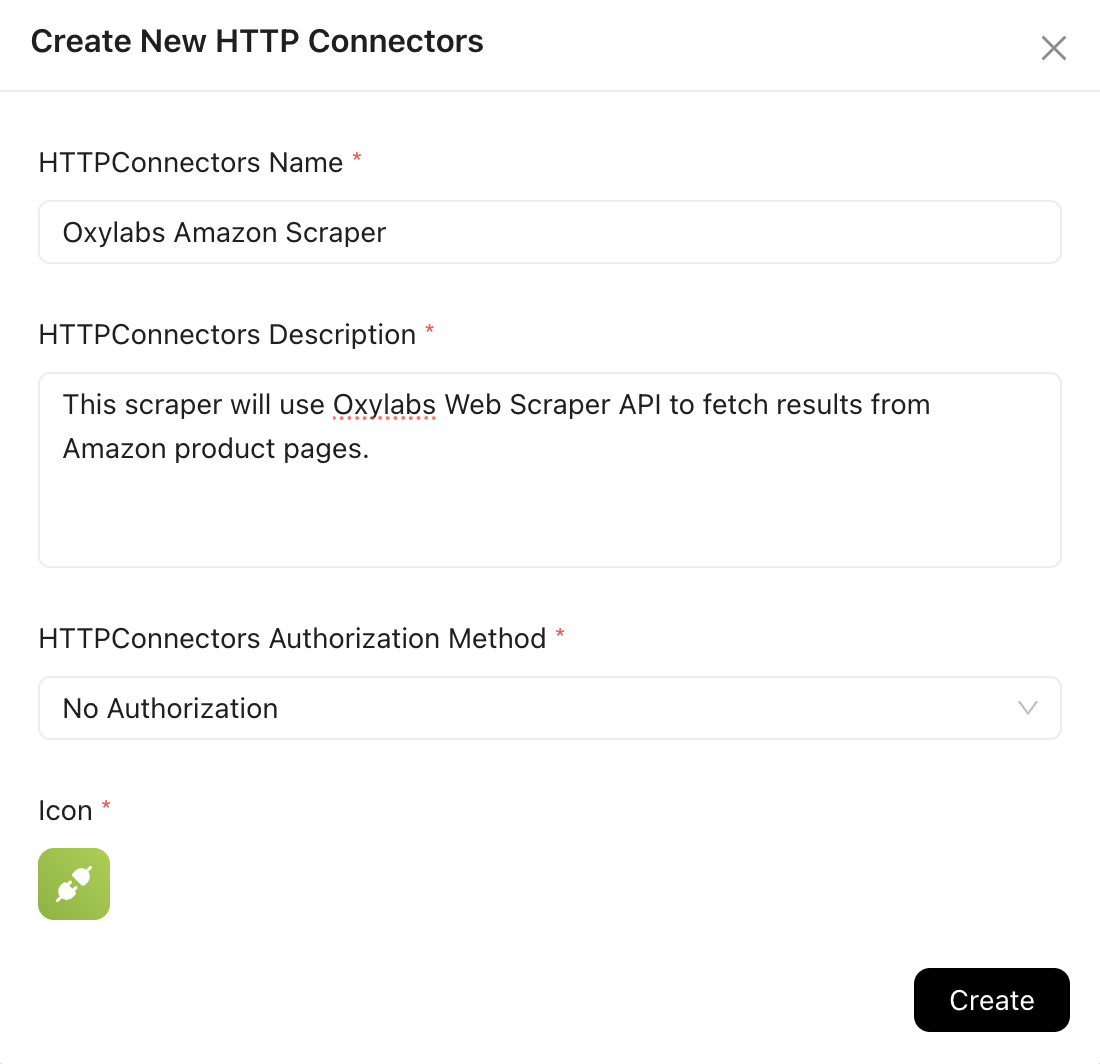
This will open a pop-out menu where you should select the HTTP Connector option:
In the modal window that opens, you will need to name your connector, provide a description, and select an authentication type.
Because the Oxylabs Web Scraper API uses the Basic authentication method, select No Authorization, as you will pass your credentials through the headers later.
This will take you to the Action management page, where you will create the action for this connector that performs your Amazon scraping using the Oxylabs Web Scraper API. Click the Add button on the right:

On the action creation page, finalize the integration:
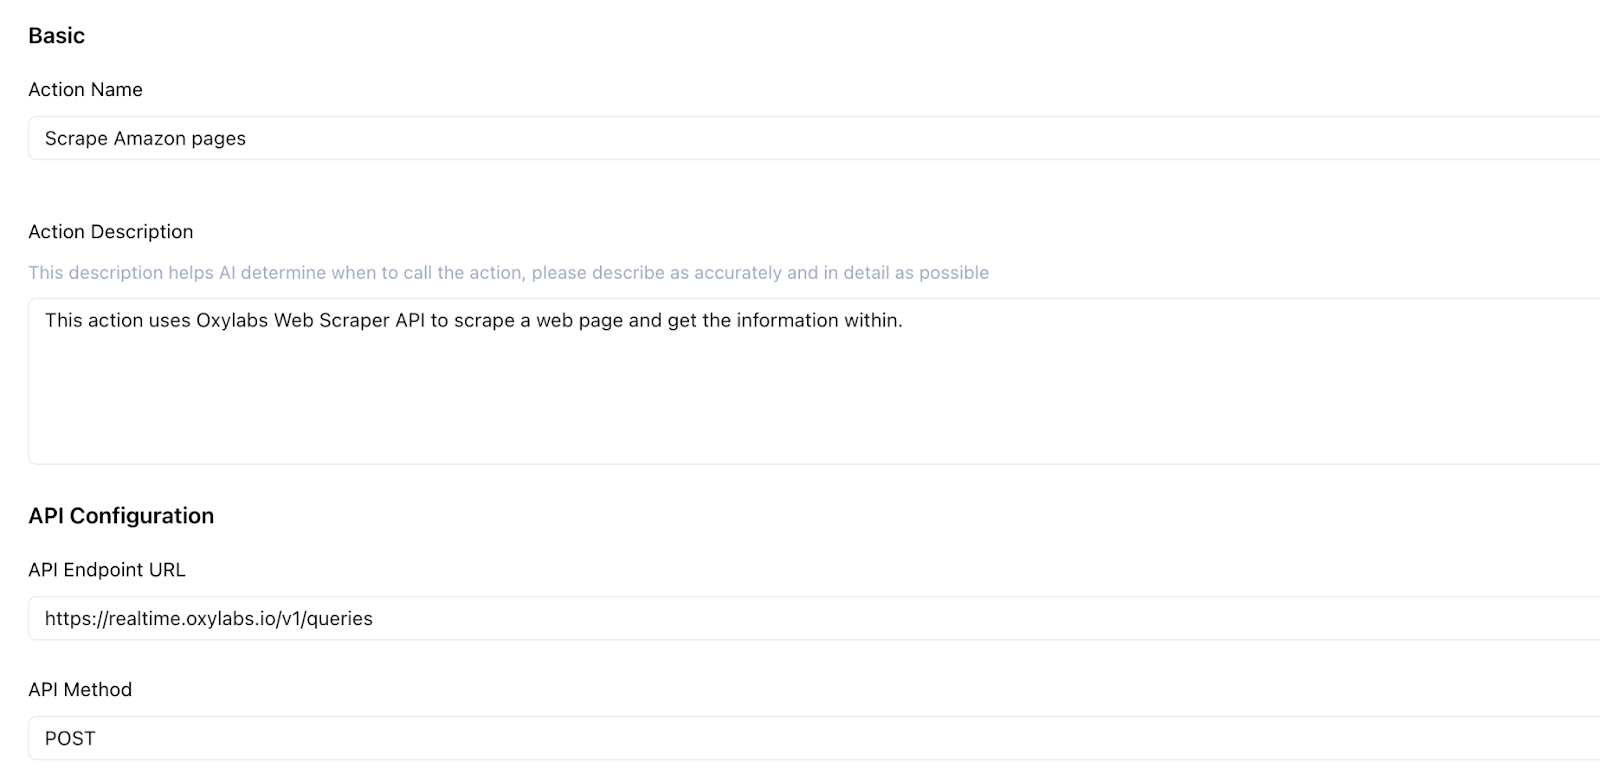
Provide the action with a name and description. Keep in mind that the description helps the AI agent determine when to use this action, so adjust it if your actions are not being triggered as expected.
You also have to specify the API endpoint and HTTP method you obtained from the Oxylabs documentation.
Then configure the request header and parameter configurations. In the header, define the Authorization you skipped earlier. Encode your username:password combination (from the Oxylabs Web Scraper API dashboard) in base64. One simple way to do this on a Mac is with the terminal command: printf %s 'USERNAME:PASSWORD' | base64
This will output your credentials encoded in base64, which you can now use in the Authorization header. Fill in the parameter name Authorization and add Basic {your base64-encoded credentials} as the value.

For the request parameters, fill out the three fields from the Oxylabs documentation: source, parse, and URL. Provide descriptions so the LLM knows when to use them.
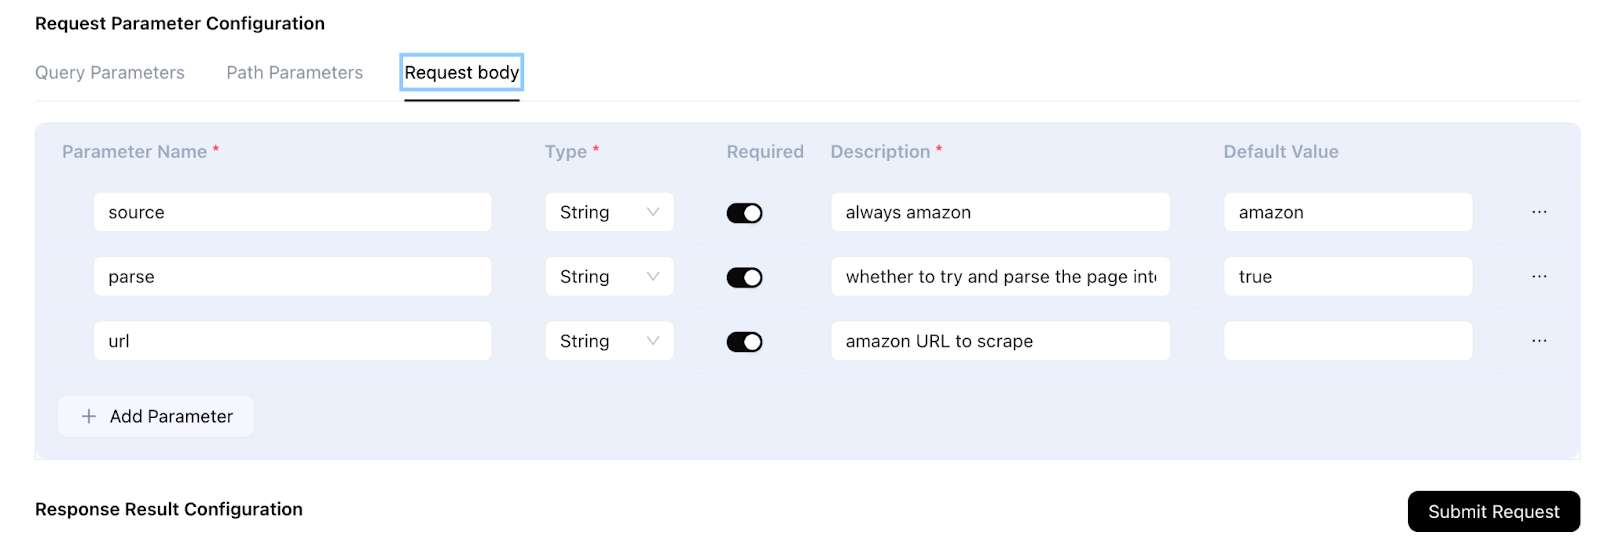
Now, add an Amazon product URL to the URL parameter value and click Submit Request to test the integration.
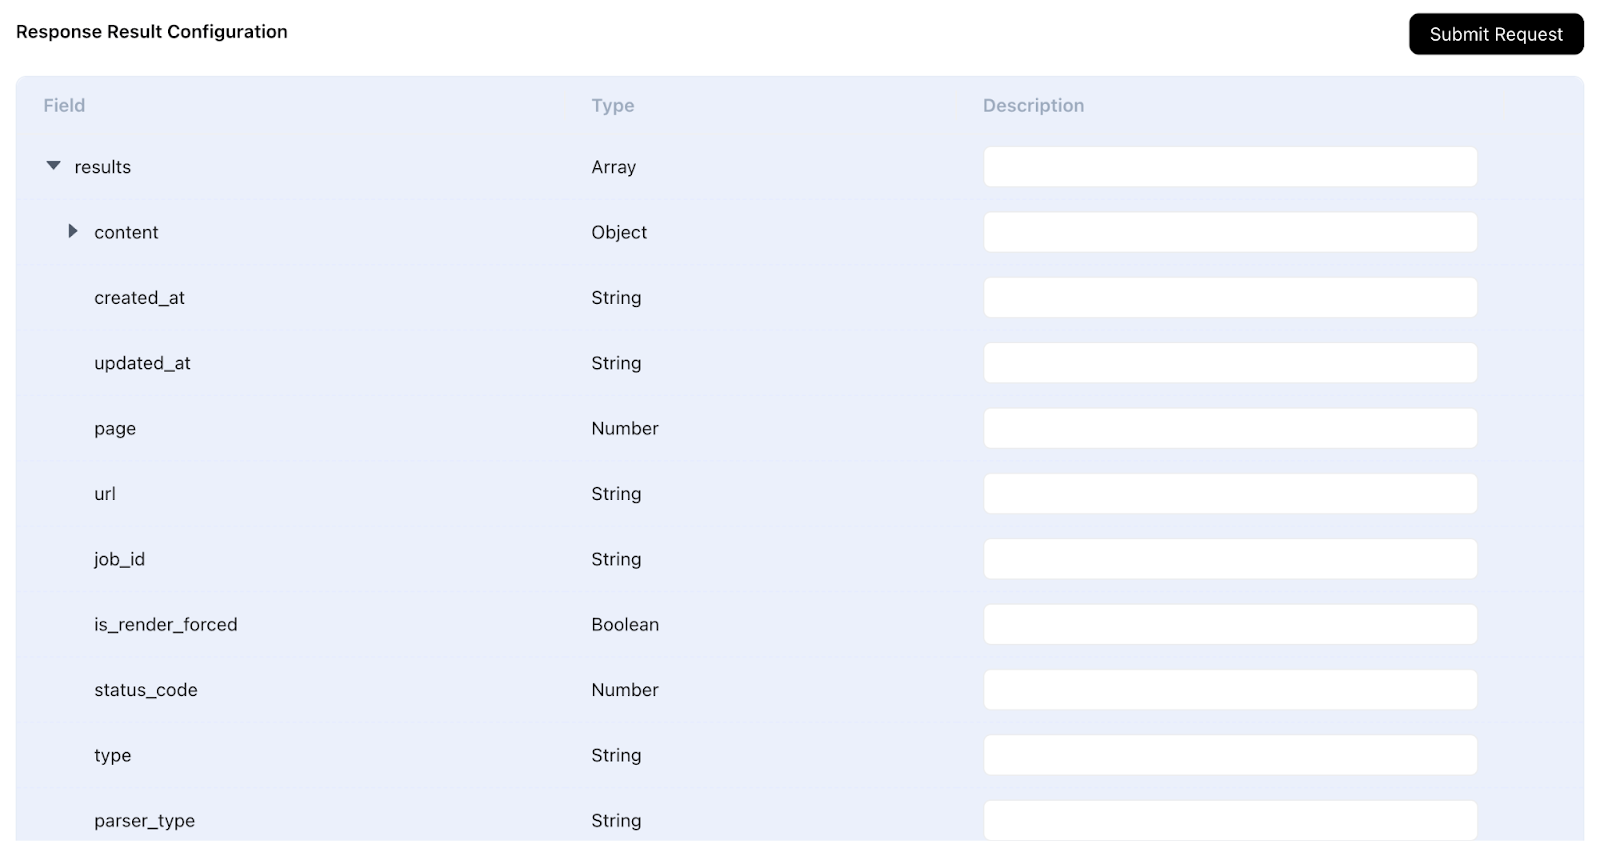
You can also provide specific descriptions for fields in the API response so the LLM knows which ones to pay attention to.
Finally, click the Save button. Your connector is now ready to be used in a simple action integrating with the Oxylabs Web Scraper API.
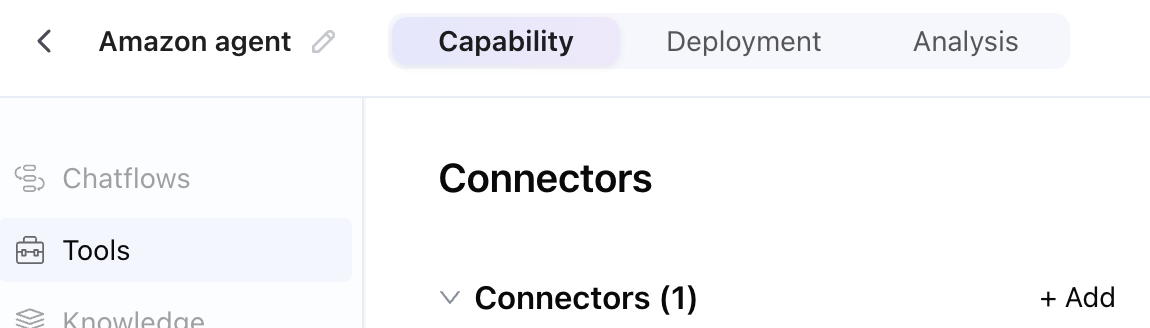
Step 3: Creating an Agent in AI Power
To create an agent, head to the agent management page and click the Create button:

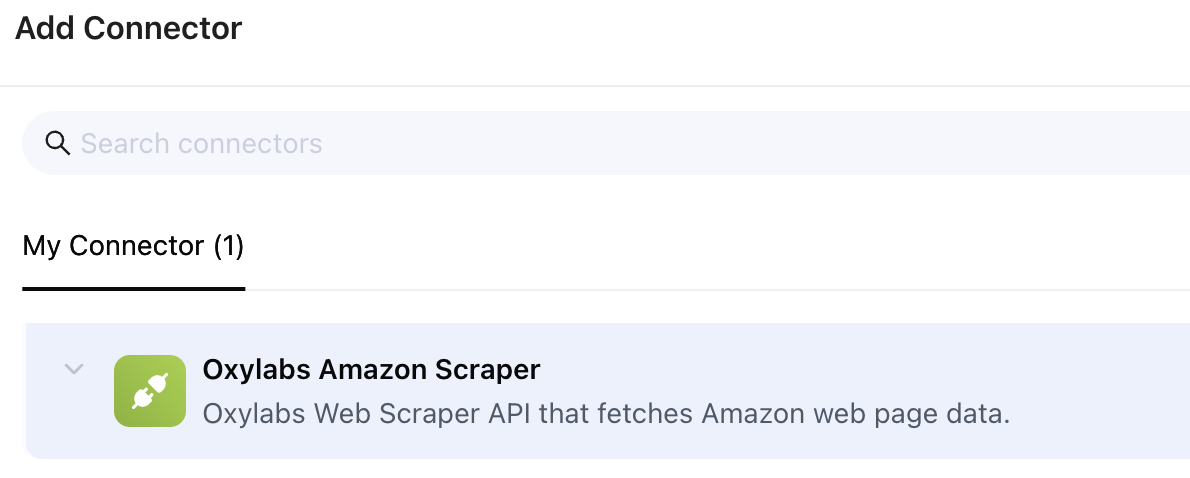
This will take you to the agent configuration screen. Next, go to the Tools section and add your recently configured connector by clicking Add:
Select your connector from the list:
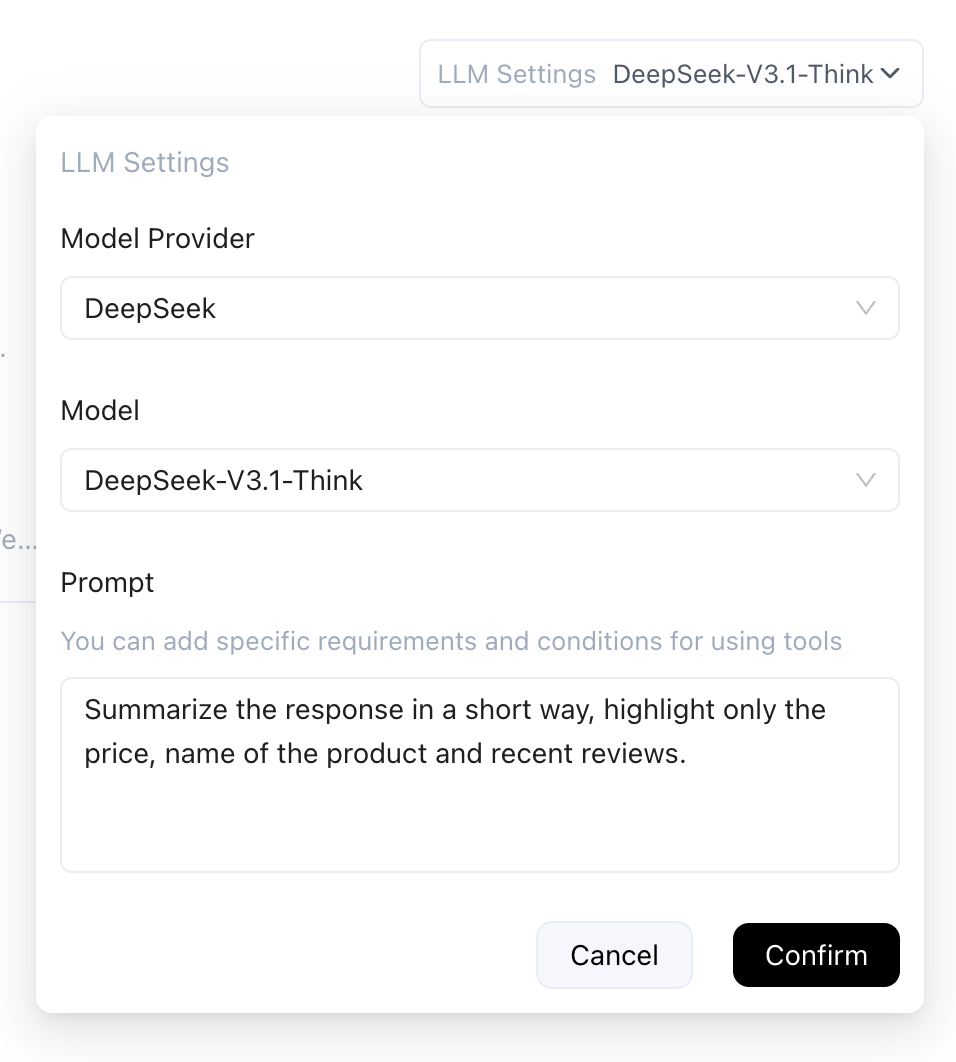
Use the LLM settings dropdown menu on the right to specify what you want your connector to return from the tool call:
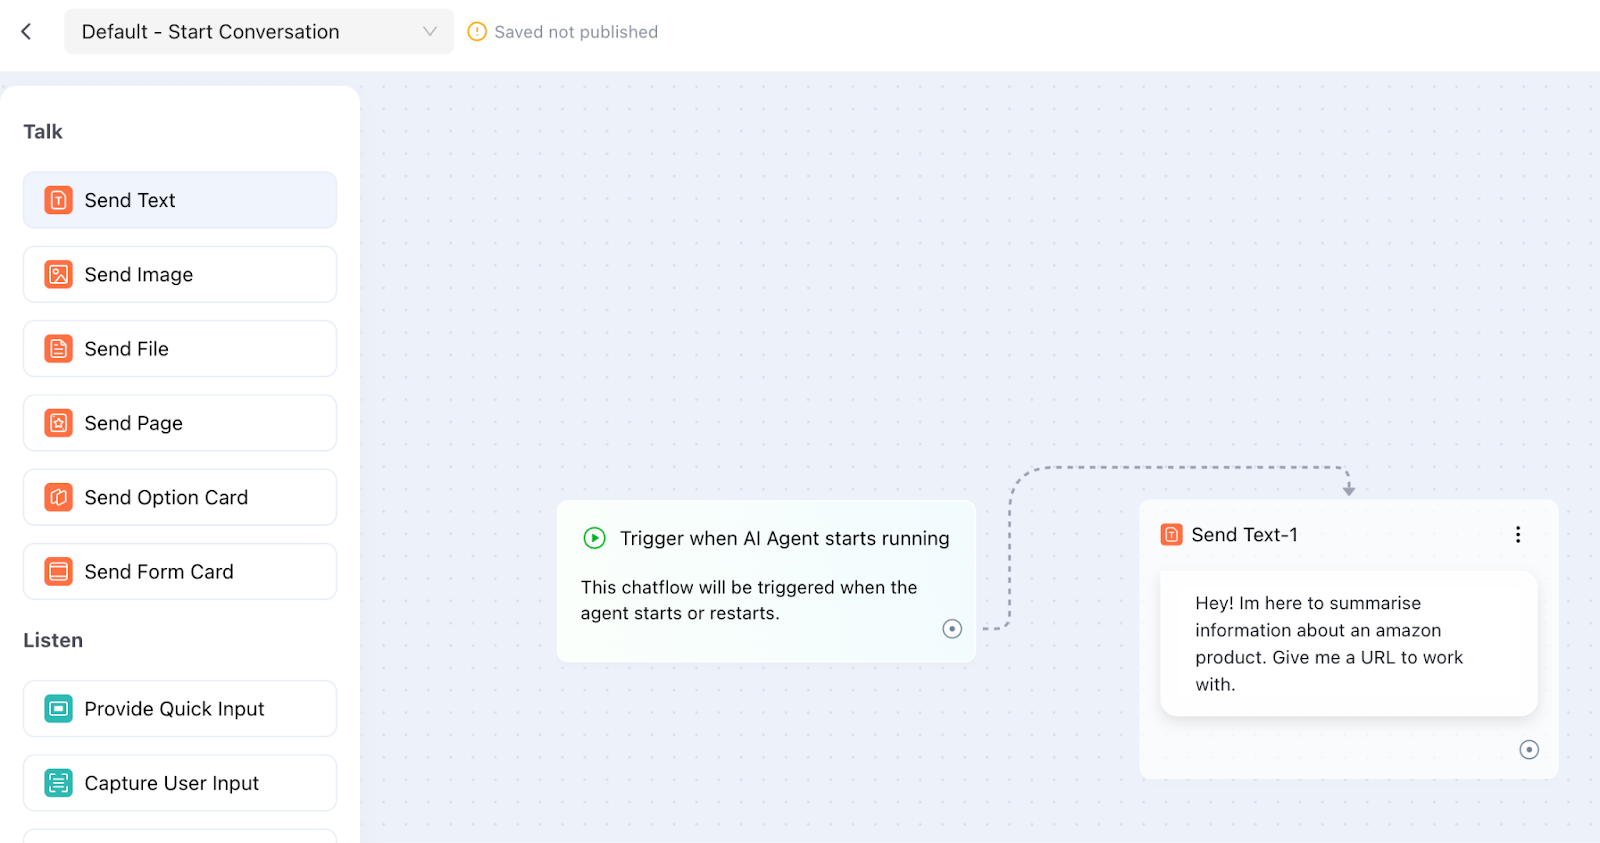
With that done, the last step is to add a simple greeting message to tell the user what to expect from the agent. Edit the default chatflow in the Chatflow management page to do this:

In the Chatflow edit window that opens, connect a Send Text block to the starting event and add your greeting message:
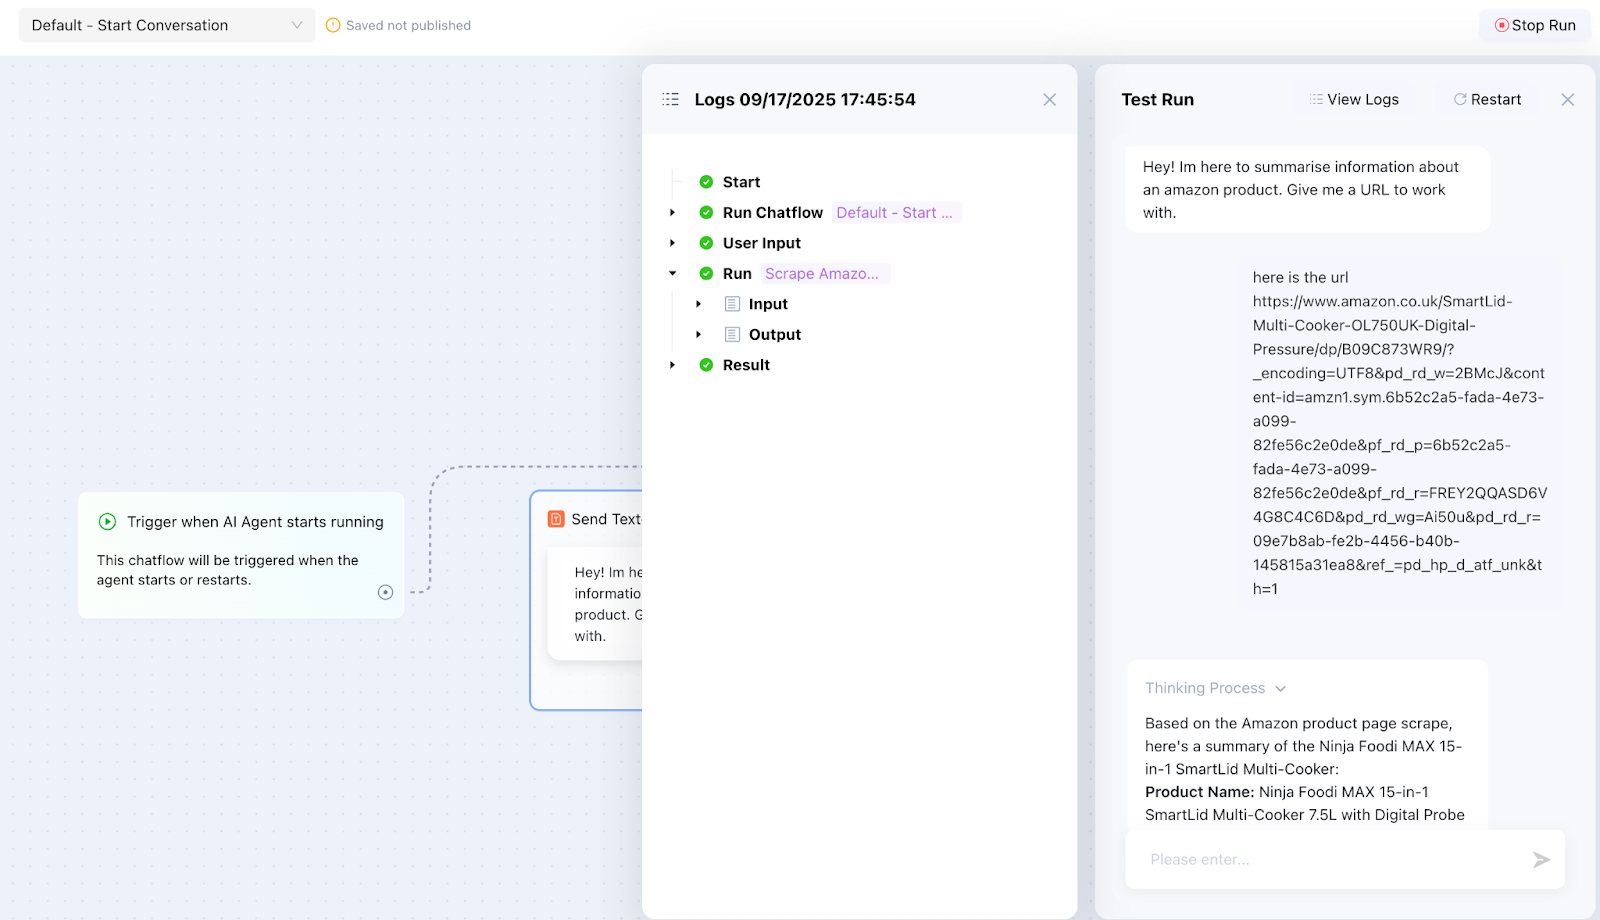
You can now test your agent by clicking the Test Run button at the top right. This opens a test chat window where you can interact with your agent, view its thought process, and access logs.
Step 4: Deploying a Workflow in AI Power
With the agent created, the last step is, of course, to share it with the world. Simply click Publish on the Agent Management page:

Next, navigate to the Deployment tab and enable your preferred method of exposing your agent:
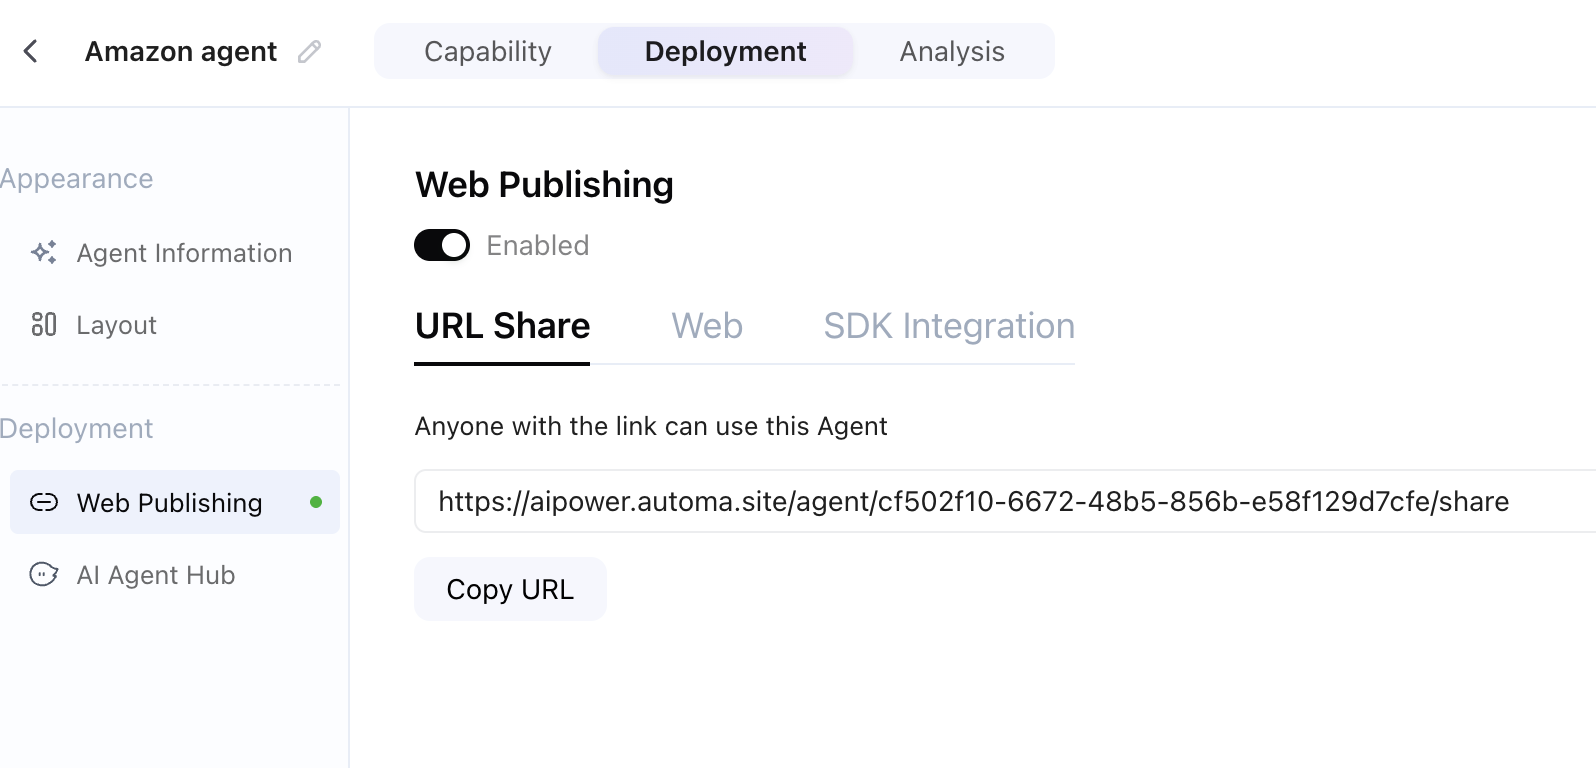
You can then use and share the link to access your assistant in a conversational interface:
Final thoughts
Automa AI Power and Oxylabs Web Scraper API are a powerful combination that lets you integrate web scraping into your automation workflows with minimal effort. By setting up a connector, configuring parameters, and deploying an AI Agent, you now have a workflow that gathers and processes web data efficiently. This setup saves time on manual scraping while making your data actionable, flexible, and ready for analysis.